6.11.1 Curl a FingerIn this example we will create a simple finger by using a conical tube tool and control it by using the INVERSE KINEMATIC and SKELETON methods. If you are already familiar with the conical tube tool, you know it creates its objects by combining quadrics, such as cones, cylinders and spheres. Because this tool is suitable for modelling robots, the question "how to keep joints stuck to each other" is quite an interesting one. The idea of this example is the following: an object created by a tube tool represents one finger. A SKELETON method is used for controlling many finger objects and the skeleton curve is animated by defining the path of its end point using INVERSE KINEMATICS. This is quite a common way to use inverse kinematics with skeletons. 1. Create a polygonal line using the function Create/Controls/Open Line. This line represents the bones of your finger, hence it consists of four points. It will be used as a primary skeleton curve. 2. Create a tube representing your finger by selecting the menu Create/Compound Tools/Conical. Because you use quadrics, the skeleton must perfectly match the tube. So, use dragging when you define center points for conical tube joints. Because inverse kinematics allows you to define the position for the END point, make sure that the direction of your tube is the same as the direction of your skeleton. Otherwise you would define the position for a finger-root, not for a fingertip. 3. Make the tube object the current level and create a SKELETON method to the same level with the component primitives of the tube. 4. Use Cut and Paste to move the skeleton curve under the method object in the hierarchy. 5. Create the secondary skeleton by creating an axis primitive perpendicular to the primary skeleton. Now the skeleton is ready, so select the menu Animate/ Control/Refresh. This instructs REAL 3D to fix the target objects to their current positions on the skeleton. 6. Now, select the primary skeleton curve and the function Modify/Special/Inverse Kinematics and modify the end point of the skeleton. Then refresh the animation system and, as you can see, the finger is pulled to the skeleton and all the joints of the finger remain connected. 7. Create an INVERSE KINEMATICS method at the same level with the skeleton curves; the skeletons will be targets for the INVERSE KINEMATICS method. 8. The INVERSE KINEMATICS method requires only one parameter, which defines the end point of the target curve. So, create a B-Spline curve defining the route for the end |
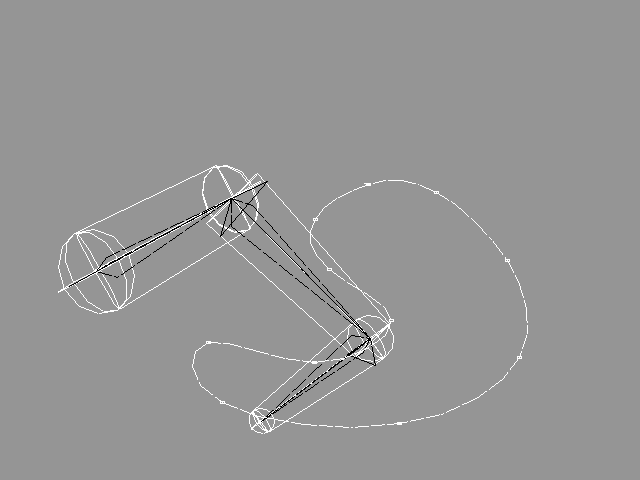 YouTube Figure T6-32: INVERSE KINEMATICS moves the end point of the skeleton while the skeleton determines the position of the finger. |
|
Play the animation, and the finger tip follows the defined curve (unless the curve is too far so that the finger cannot follow it; then the finger just reaches out as much as possible). Okay, let's improve this animation a bit. So, jump to the next example but don't delete this one. |
| ghh don'tpanic |